
A first portrait often looks wrong even when every feature is drawn well. The eyes have lashes, the nose has a clean shadow, the lips have a soft shine, and the face still feels off. The cause is usually placement. A feature set a little too high or a little too wide pulls the whole head out of balance, and a viewer reads that in a heartbeat.
A handful of measurable relationships fix most of this. This post shows how to draw face proportions in two ways. The first is a set of basic guidelines for a face seen straight on, each tied to a landmark you can find on any sitter. The second is the Loomis method, a way of building the head from a simple ball so the guidelines rest on a solid form. Either one helps on its own, and they work best together. By the end you will have a clear routine for placing features, turning the head, and checking your drawing against a real face.
Why Facial Proportions Matter More Than the Features
Proportion is the size and spacing of one part against another. In a face, it covers how far the eyes sit from the chin, how wide the nose is against the gap between the eyes, and how much room the forehead takes up. Facial proportions for drawing decide whether a portrait looks like a person or like a collection of parts.
Spacing carries a likeness more than detail does. Research on how people recognize faces found that when features were shifted slightly in an image, observers were most sensitive to the vertical position of the mouth, then the eyes, then the nose. A mouth set a little too high gets noticed before a poorly shaded cheek does. Viewers also spend around half of their looking time on the eye area, so any slip in the eyes shows quickly.
Most of us draw a face from memory even when a model sits in front of us. The mind keeps a simple symbol of a face, and the hand follows the symbol. In one study, adults who described themselves as drawing novices placed the eyes at 0.57 of the head's height measured up from the chin, where the average face sits at 0.477. When those same people copied a photograph, the eyes still landed too high. Their copies also drew the eyes at more than twice their true size in relation to the head, and formal drawing lessons at school made no difference to the eye-placement errors.
That is a useful thing to know, because it shows the problem lies in how we look and has little to do with talent. The guidelines in this post give you a way to check what you see. Treat each one as a question to put to the face in front of you, and as a starting point for the drawing. No formula can replace looking, and every face will bend the rules a little.
A Simple Facial Proportions Guide for the Front View
These six relationships make up a facial proportions guide for a head seen straight on. Each one points to a landmark you can find on any face, so you can check it with your eyes and a pencil.
The eyes sit halfway down the head
Measure from the top of the skull to the chin, and the eye line falls at the middle. The top of the skull sits higher than the hairline, so the hair and forehead need to be included in your measurement. Most beginners put the eyes near the upper third of the head, which leaves a cramped forehead and a long chin. Even when adults arranged foam features by hand, they set the eyes too high, at a mean of 0.61 against the true ratio of about 0.5. Draw the halfway line first and the rest of the face has room to settle.
The face divides into thirds
From the hairline to the brow is one third. From the brow to the base of the nose is the second, and from the base of the nose to the chin is the last. Painters have used this canon for centuries, and the idea reaches back to Leonardo da Vinci and Albrecht Dürer. Use the thirds to place the brow line and the base of the nose once the eye line is set. They give you three horizontal markers that organize the whole face.
The head is about five eyes wide
Measured across the eye line, the head is roughly five eye-widths wide. There is about one eye's width between the eyes, and one more eye's width from each outer corner to the edge of the head. This relationship helps you place the eyes sideways, which is the second half of the placement problem. A pencil laid across one eye gives you the unit, and you can walk it across the face.
The nose lines up with the inner corners of the eyes
Drop two light vertical lines from the inner corners of the eyes, where the tear ducts sit. The wings of the nostrils usually fall close to those lines. This is the quickest way to handle drawing eyes and nose placement together, because one set of lines serves both features. Keep the lines pale and let the nostrils sit just outside them if the face in front of you calls for it.
The mouth sits closer to the nose than to the chin
The line between the lips falls about a third of the way down from the base of the nose to the chin. The corners of the mouth fall roughly under the pupils. A mouth set too low is a common slip, and since the mouth is the feature viewers react to first when it moves, it is worth a second look.
The ears run from the brow line to the base of the nose
Seen from the front, the tops of the ears line up with the brow and the lobes line up with the base of the nose. The ears sit at the sides of the head, level with the middle of the face. Drawing them between those two lines keeps them from sliding up toward the eyes, and from drifting down toward the mouth.
How to Draw the Head With the Loomis Method
The Loomis method is a way to build a head, with measuring built into every step. Andrew Loomis set it out in Drawing the Head & Hands, published by The Viking Press in 1956. Where the guidelines above measure a head that already exists on the page, this method constructs it from simple forms. Here is the sequence.
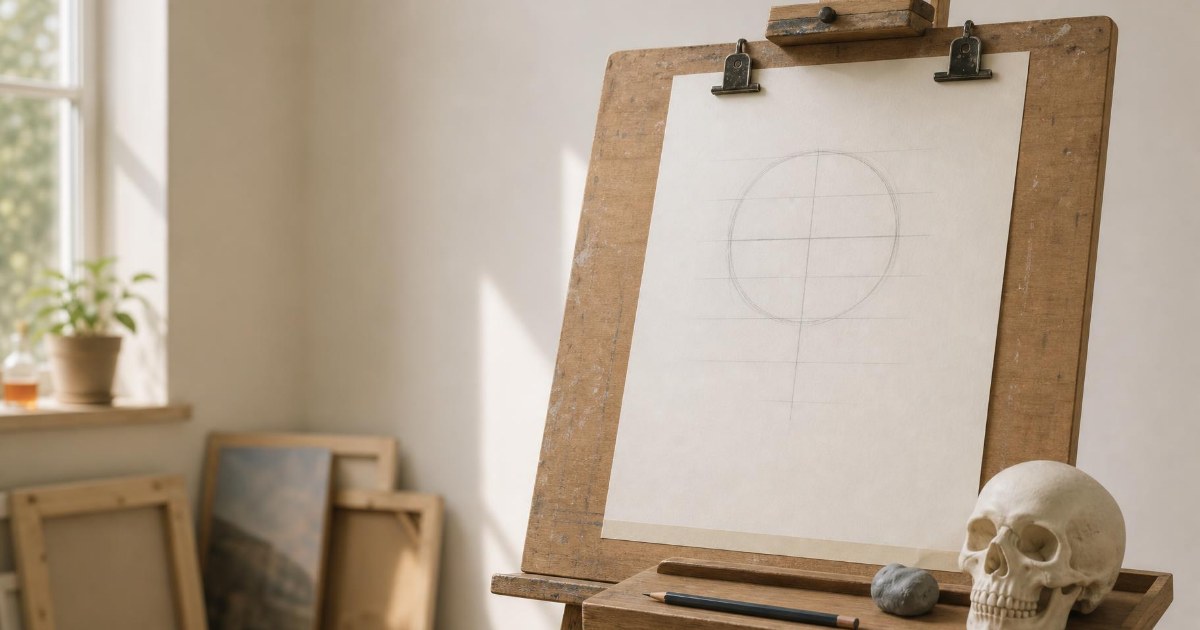
Start with a ball. Draw a circle for the cranium, the rounded part of the skull that holds the brain. Think of it as a sphere, even though you are drawing a circle.
Add a cross. Draw a vertical center line down the middle of the ball and a horizontal brow line across its widest point. On a head seen from the front, the center line splits the face into two halves, and the brow line is where the eyebrows will sit.
Slice the sides flat. A real head is narrower from side to side than the ball suggests, so cut a flat plane from each side of the circle. What remains is the front of the skull and two flat side planes. The ears will live on those side planes.
Mark the face at equal intervals. Extend the center line below the ball, and mark the hairline, brow line, nose line and chin. The distance from hairline to brow, from brow to the base of the nose, and from the base of the nose to the chin is the same each time. This is the familiar rule of thirds, now attached to a solid form.
Draw the jaw. From the flat side of the head, run a line down and forward to the chin. The jaw should follow the shape of the skull and curve with it. The chin sits on the center line at the bottom mark.
Place the ear. Set it at the back of the flattened side plane, between the brow line and the nose line. Its position behind the middle of the head becomes clear in the three-dimensional version.
Keep every construction line light. These lines are scaffolding, and you will erase most of them when the features are in place. A soft pencil pressed lightly leaves marks that lift off the paper without a trace, while a hard press scars the surface. Draw the circle, the cross and the intervals with a loose hand, and darken only the lines you intend to keep.
The method holds up at any angle because the guidelines sit on a three-dimensional form. When the head turns, the ball turns with it, and the lines curve around the surface and follow it. That is why artists who learn the Loomis method can draw a head from the front, the side, above or below with the same steps.
When the Head Turns or Tilts
The front-view guidelines still apply when the head turns, but they curve around the form. Picture the cross on the ball as a pair of lines drawn on a globe. Turn the globe, and the lines turn with it.
In a three-quarter view, the center line moves off the middle of the face toward the side the head is turning. The far side of the face becomes narrower, because more of it slides out of sight around the curve of the skull. The near eye looks larger and the far eye looks smaller and closer to the nose. The brow line, eye line and mouth line all curve gently across the form, and the curve follows the ball.
In profile, the ear sits behind the middle of the head, and the eyes sit back from the front edge of the face. The brow, nose and chin make the front contour. A common slip in profile is to draw the head too narrow from front to back, so the ear ends up too close to the face. The ball helps here, since the cranium extends well behind the ear.
Tilt changes how the ears sit against the features. When the head tips up, the ears appear lower against the features, because you are looking at the head from below. When it tips down, the ears appear higher. The cross on the ball helps you track this, since the brow line bends upward or downward and the ears follow it.
Human Head Anatomy Under the Guidelines
The guidelines work because they follow the skull. Beneath the skin, the skull is a fixed structure, and the lines fall where they do because bone sets the main landmarks. Understanding human head anatomy gives each rule a reason.
The cranium is the large rounded form that the ball stands for. The brow ridge sits just above the eye sockets and marks the brow line. The cheekbones set the width of the face at eye level and shape the sides of the cheek. The jaw hangs below the cranium and gives the lower face its shape, which is the reason the chin sits where the Loomis lines say it will. The eyes sit in sockets set deep in the skull, which explains why the eye line falls lower than people expect.
The head also has planes, which are the flat areas that meet at angles. Artists commonly describe four: the front of the face, the sides, the plane under the nose, and the plane under the jaw. The planes show where features sit, since the nose projects from the front plane and the mouth wraps over the curve of the teeth. They also show where light falls. A plane that faces the light is bright, and a plane that turns away goes dark. Once you can see the planes, shading a face follows from the form.
Drawing the skull from several angles builds a sense of where the features belong. Try a simple skull from the front, the side and three-quarter view. When you return to a living face, you will find that the eye sockets, the cheekbones and the line of the jaw are easier to read through the skin.
Checking Proportions Against a Real Face
The guidelines describe an average face, and no sitter matches the average exactly. Measurements of 168 young adults showed that the three facial thirds were not equal. The lower third was longer than the middle third in 91.4% of men and 88% of women. The space between the eyes equaled the width of an eye in only 29% of men and 25% of women. Earlier work found that "one eye between the eyes" held in only 33% of North American white participants and 13% of African American participants. The lower third and the width of the nose were the only measurements that differed significantly between men and women, so a male face may show a longer lower third and a wider nose than a female face.
Use each guideline as a question. Is the space between this person's eyes really one eye wide? Is the lower third longer than the middle one? The answer shapes the likeness, because the places where a sitter departs from the average are the places that make the face theirs.
To measure, hold a pencil at arm's length with your arm straight and one eye closed. Slide your thumb along the pencil to mark a length, such as the width of one eye, and carry that length across the face to see how many times it fits. Compare the same length on the drawing. Checking the shapes of the gaps around the head with negative space is another way to test a placement.
A few slips show up again and again. The eyes are drawn too high and too large. The nose is drawn too long. The neck is drawn too thin, when it is usually wider than beginners expect and meets the head under the ears. When a drawing feels wrong, check these three first.
Fresh eyes catch errors that tired eyes skip. Flip the drawing in a mirror, or turn the reference photo upside down, and look again. Step back across the room and the distortions often jump out. These portrait drawing tips cost nothing, and they work on drawings at every level.
Keep Practicing in Front of a Real Face
Proportion improves with practice in front of a real face. Every sitter teaches something new, and every drawing sharpens the habit of checking what you see.
Atelier School of Art teaches drawing in Royal Oak, with classes offered for all ages from Youth Studio through adult. The Atelier Drawing class is suggested for drawers of all experience levels, and its topics include sight measuring, block-ins and shading. The Art From Life class moves through gesture drawing, sight measuring and human proportions with a live model. You can read about each of these in the class catalog, and the Contact Us page is the place to ask a question or arrange a visit.