

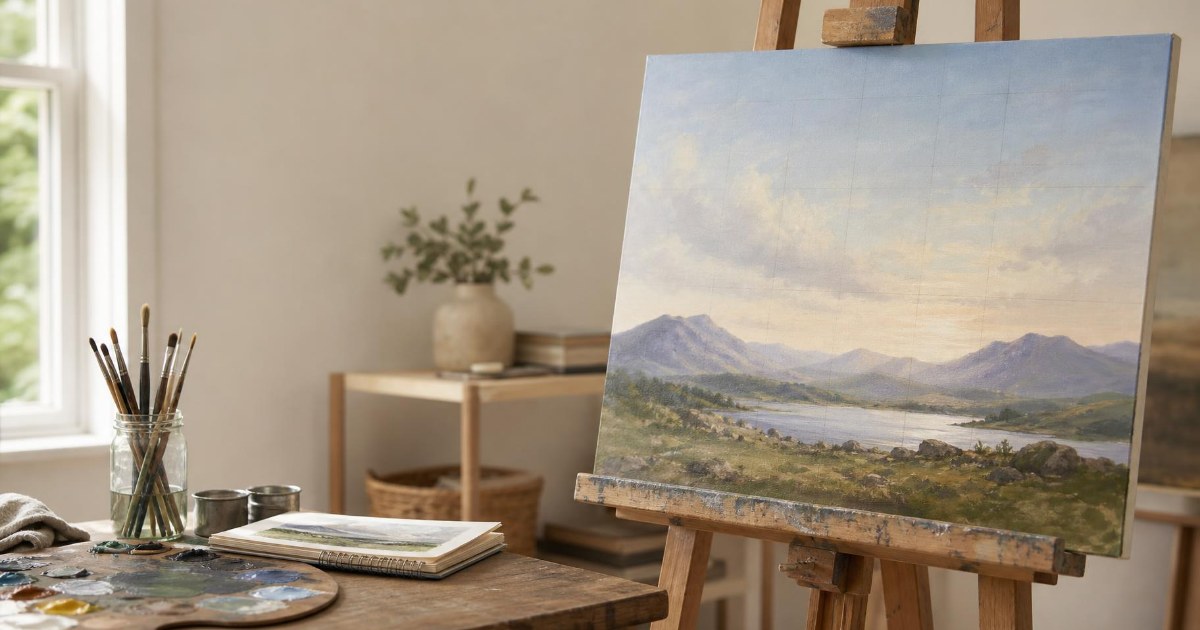
A subject parked in the dead center of a canvas tends to sit there like a stamp. A horizon that slices the picture into two equal halves does the same thing, and the viewer's eye has nowhere to travel. The rule of thirds in art is the first composition tool most painters learn, and a simple grid fixes both problems. By the end of this guide you will be able to place a focal point with confidence, balance a canvas with unequal areas, and choose between the thirds grid and the golden ratio. Every step works with oil paint, graphite or charcoal, so you can try it on whatever you are making this week.
What Is the Rule of Thirds in Art?
The rule of thirds divides a canvas with two evenly spaced horizontal lines and two evenly spaced vertical lines. Those four lines cut the picture into nine equal sections, much like a tic-tac-toe board laid over your painting. The four places where the lines cross are often called power points or hot spots, and they are where the most important elements of the picture belong.
The idea is older than the grid. The term was first written down in 1797 by John Thomas Smith, an English writer, in his book Remarks on Rural Scenery. Smith was writing about landscape painting. He recommended two thirds of one element (as of water) to one third of another element (as of land) as a more harmonious proportion than a border drawn through the center. His advice put the dividing line at a third of the picture's height, and painters have used that proportion in skies, seas and fields ever since.
Photographers later turned Smith's proportion into the grid that now appears on phone cameras. Painters had the idea first, and a grid is just as handy at the easel. Think of it as a map of where the eye will go. The intersections draw attention, the lines guide it, and the center stays open for the picture to breathe.
How the Grid Creates a Stronger Focal Point
A focal point in painting is the spot where you want the viewer to look first. The grid gives you a place to put it. A small center of interest, such as a lantern, a face or a single apple, sits on or near one of the four intersections. A long subject, such as a doorway, a tree trunk or a standing figure, runs along one of the vertical lines. A horizon sits on the upper or lower horizontal line, which gives the sky or the land two thirds of the picture and leaves the center free of a dividing line.
Once the main subject has its place, the remaining intersections are good homes for secondary elements. A smaller shape on a second intersection supports the focal point and gives the eye somewhere to rest after it has looked. Major shapes belong away from the edges of the canvas, because a shape that hugs the border pulls the eye out of the picture.
Placement works best alongside contrast. The focal area is also the place for the strongest value or color contrast in the painting, whether that is the darkest dark beside the lightest light or the richest color among quieter neighbors. Placement tells the viewer where to look and contrast confirms it. A small black-and-white sketch is the quickest way to test this, and our guide to value studies shows how to plan the light and dark pattern before you touch a full palette.
Two examples show the grid at work. Georgia O'Keeffe's Black Place III, painted in 1944, has a composition that divides roughly into thirds, and laying a grid over a reproduction shows where the large bands of the landscape settle. Portraits tend to follow the grid too. In an analysis of 727 paintings by around 200 Western painters, portraits scored slightly higher on the rule of thirds than other subjects, likely because faces tend to sit in the upper part of the canvas near the third lines.
Using the Rule of Thirds for Visual Balance
Visual balance comes from visual weight. Every large dark shape, busy area or bright accent pulls on the eye, and the painting feels settled when those pulls are shared out sensibly. An even half-and-half split of sky and land gives you two masses of equal strength that compete with each other, so the picture feels static. A split of two parts to one gives you a larger mass and a smaller counterweight, and the picture feels resolved. The same split works for light and dark, and for busy and quiet areas.
A common mistake shows how this plays out. Say you place the horizon on the lower line, which gives the sky two thirds of the canvas. If the sky is empty and every tree, rock and building gathers in the bottom third, the painting grows heavy at the bottom. The viewer's eye sinks to the detail and the large quiet area above has no job to do.
There are two good ways to rebalance it. Move the horizon to the upper line, and the land takes two thirds of the canvas with plenty of room for its detail, while the sky becomes a calm third. Or keep the horizon low and give the sky something to do, such as a cloud mass, a band of warm light near the horizon or a single bird high on a vertical line. In both versions the larger area carries enough interest to hold its size. A small area of strong contrast can also balance a large quiet one, so a tiny bright boat on a wide gray sea can outweigh a great deal of empty water.
How to Apply the Rule of Thirds to Your Next Painting
Improving art composition is easier when you work in a set order. These four steps suit paint and drawing alike, and they take only a few minutes before you start.
Define the Picture Plane
Mark the edges of the actual image area on your paper or canvas. If you plan to leave a border or mat the finished piece, draw the picture's outline with a ruler so the grid fits the picture you will really show.
Divide It Into Thirds
Measure each side of the image area and divide by three. Choosing dimensions that divide evenly makes the measuring simple, and a 12 by 18 inch picture gives you 4 inch and 6 inch sections. Close is good enough, since the grid is a guide. Draw the lines lightly in pencil or thin charcoal so they are easy to lighten later.
Plan With Thumbnails and a Cropped Reference
Make several small sketches with the grid drawn on each one, and move the focal point to a different intersection every time. If you work from a photo, lay a grid from your phone camera or an app over the reference and slide the crop around. Testing crops on a screen costs nothing, and you can settle the arrangement before you commit to the canvas.
Block In the Focal Point First, Then the Rest
Place the center of interest at its intersection, then sketch the secondary elements around it. Lighten or cover the grid lines before paint or shading goes on. Artists who work out the drawing on a separate sheet can follow the same steps and transfer the finished line drawing to the canvas.
Rule of Thirds vs. the Golden Ratio: Which to Use
The golden ratio divides a line so that the whole relates to the longer part as the longer part relates to the shorter. The ratio is the irrational number 1.618…, which puts the longer part at 0.618 of the whole. The rule of thirds puts its line at 0.667. On a canvas 24 inches wide, the golden division sits about 14.8 inches from one edge and the thirds line sits at 16 inches, a gap of roughly an inch. That closeness is why the thirds grid is often taught as a simpler, rounded-off version of the golden ratio.
Many stories surround the golden ratio, and the measurements tell a plainer tale. In Gustav Fechner's 19th-century rectangle experiment, the rectangles people chose most often as best had a ratio of 0.62, within a range of 3:5 to 5:8. That is a real preference worth knowing. The claims about the Parthenon and Leonardo da Vinci carry less weight. The Parthenon's golden ratio is not supported by measurement, and the text around the Vitruvian Man mentions only whole-number ratios.
Each tool has a job. The thirds grid is the quick, easy-to-measure starting point for rectangles, landscapes and horizon placement, and you can draw it with a ruler in a minute. The golden ratio, or the golden spiral that grows from it, suits a painter who wants a subtler, less predictable placement or a curving path for the eye through a complex scene with many figures. Many painters start with thirds and reach for the golden spiral when a crowded picture needs a clearer route.
When to Break the Rule of Thirds
The grid is the wrong tool in several situations. Symmetrical or front-facing subjects hold the center well. In preference tests, viewers chose the center of the frame as the best spot for a single object, and eye-tracking research finds that viewers look at the center of an image first. A portrait whose background already frames the face may need no grid at all. Round and oval formats have no corners for the lines to meet, and the grid works only with rectangles. Some pictures call for something else because of their story, such as a lone figure placed dead center to make a viewer feel confronted.
Think of the rule as training wheels. It helps you learn early what an off-center arrangement can do, and it limits you once it becomes the default. It cannot replace thinking about the story and intent of a piece. The 727-painting analysis found that rule-of-thirds values in museum paintings were low, outside portraits about as low as in photographs that ignore the rule, so many celebrated painters worked by other instincts.
One finding is worth keeping when you do place a subject off center. Viewers prefer a side-facing subject to look into the frame, so a right-facing figure sits best left of center and a left-facing figure sits best right of center.
Composition is easier to learn with someone looking over your shoulder. At Atelier School of Art in Royal Oak, composition is one of the topics in our Atelier Drawing class, alongside perspective, sight measuring, block-ins and shading, and it is part of the Art From Life curriculum. We keep classes right around 10 students, so every artist gets one-on-one guidance at the easel. When you are ready, use Register for Classes to choose a class time, or get in touch through our Contact Us page to tour the studio first.