

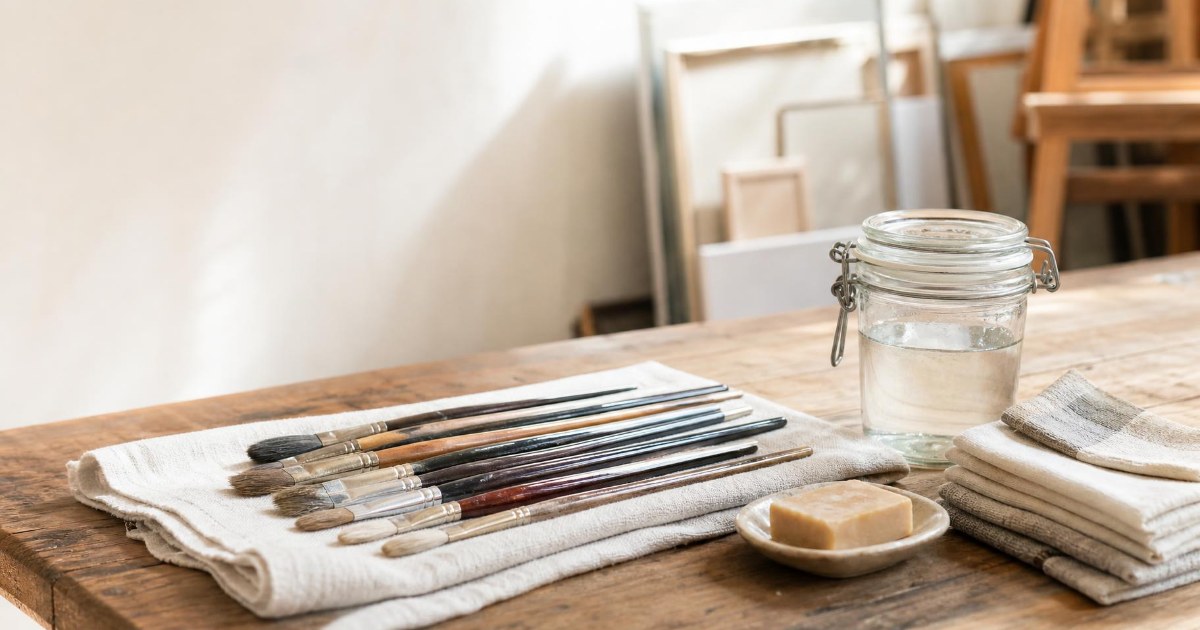
Oil paint left in a brush dries in the heel of the bristles, right beside the ferrule. From there it pushes the hairs apart, and the brush stops holding a point or a clean edge. A clean oil based paint brush keeps its shape for years, and the habits that protect it are easy to learn. This guide shows how to clean oil paint brushes after a painting session, what to use between colors, how to rescue a brush with dried paint, and how to dry and store brushes so they last. You will also find what to clean with and how to handle solvents and oily rags safely.
Why Oil Paint Brushes Need a Proper Clean
Watercolor dries as its water evaporates, and plain water rinses it away. Oil paint follows a different path. It cures by reacting with oxygen in the air, which slowly turns the paint into a solid film. Water cannot loosen that film, and paint that cures in the heel of the brush, near the ferrule (the metal band that holds the hairs), is very hard to remove.
A neglected brush shows its history. The hairs fan out from the ferrule, the tip loses its shape, and a flat that once cut a crisp edge leaves a ragged one. The brush stops doing the work it was made for.
Brushes also settle into the hand over time. A round that you have shaped and cleaned the same way for months returns to its point with a gentle press of the fingers, and that familiarity fades once paint hardens in the heel.
Clean brushes protect your color too. Pigment left in the bristles travels into the next mix. A trace of ultramarine in a brush headed for a warm flesh tone, or a bit of cadmium red in a brush loaded with fresh green, dulls the mixture and muddies the passage.
Solvent, Oil or Brush Soap: What to Clean With
Three families of cleaners do the work, and each has its own job.
Solvents dissolve paint quickly. Odorless mineral spirits and turpentine are the two most common. Turpentine has a flash point of 95°F and counts as a flammable liquid, and mineral spirits have a flash point of 102 to 110°F and count as a combustible one. Both belong in a ventilated room and off the skin.
Oils follow the old rule that oil cleans oil. A drying oil such as linseed, safflower or walnut loosens paint from the bristles and carries it away, and it can be used during a session or at the end. Non-drying oils such as vegetable or canola oil are kept for the end-of-session rinse and always followed by soap and water. Oils from the grocery store used during painting should be free of vitamin E (tocopherols), which slows drying. Baby oil and other mineral oils stay out of the kit.
Soaps finish the job. Bar brush soaps and vegetable oil soaps lift the last pigment and the oil film from the base of the bristles. Oil and solvent leave a film in the hairs, so every method ends with a soap wash.
The choice of brush soap vs solvent comes down to your space and your habits. Solvent is fast, and a solvent-free routine of wipe, drying oil and soap keeps fumes out of the room.
Some products never go near a brush. Acetone, lacquer thinner and shellac remover can dissolve the glue that holds the hairs in the ferrule.
The basic kit is short: rags or paper towels, two jars with lids (one for the first rinse and one for a cleaner second rinse), and gloves when you use solvent.
How to Clean Oil Paint Off Brushes After a Painting Session
Paint begins to set as soon as a brush rests, so set out your rags, jars and soap before the last brushstroke. Here is how to clean oil based paint brushes at the end of a session, and the same steps work on bristle, sable and synthetic heads.
- Wipe out as much paint as you can with a rag or paper towel. Press from the ferrule toward the tip with a steady squeeze, and keep the motion smooth and gentle.
- Rinse the bristles in oil or solvent. Work them gently against the side or bottom of the jar, and keep the brush from being jammed straight down onto its tip. Wipe again, and repeat until little color comes out.
- Wash with brush soap or a mild vegetable oil soap in lukewarm water. Work the lather into the base of the bristles at the ferrule, where paint hides.
- Rinse with the brush pointing down so water runs away from the ferrule. Keep rinsing until the lather is white and the water runs clear.
- Squeeze out the water, reshape the head with your fingers, and lay the brush flat to dry.
Watch the lather as you wash. When rubbing the brush on the soap produces only white lather, the paint is out.
Painters who prefer to skip solvent can follow the same pattern with oil alone. Wipe out the paint, dip the brush into a drying oil about 2 to 3 inches deep, and wipe again until the oil runs clear. Finish with soap and water at the end of the session. Pigment settles out of cleaning oil over days to weeks, so keep the jar lidded and let the sediment gather on the bottom.
Cleaning Between Colors and Between Sessions
Cleaning between colors keeps a session moving without a full wash. Wipe the brush on a rag, dip it into a little drying oil if paint remains in the bristles, and wipe the oil out completely before loading the next color. Oil left in the hairs thins the next mixture and changes how it handles.
Brushes work harder when each has a job. Many painters give one brush to each color family or value, such as one for darks, one for lights and one for warm mixtures, so every brush needs less cleaning. A palette arranged by color family makes this routine easier, since each brush has a natural place to return to.
A brush left resting tip-down in a jar bends its bristles for good, so keep them upright or lying flat while you work.
Between sessions, some painters leave brushes lying in a tray of oil overnight. The conservation view differs. Brush tips kept permanently in oil let paint build up in the ferrule and can loosen the glue that holds the hairs, so continuous submersion is not considered good practice. A full wash at the end of the day is the safer habit.
How to Remove Dried Oil Paint From a Brush
A brush that has sat with paint for a day or more needs a slower approach. Work a paste-type brush soap or a brush restorer deep into the bristles, pressing it toward the ferrule with your fingertips. Leave it to sit so the soap has time to soften the paint. Then wash with soap and lukewarm water, rinse with the tip pointing down, and look at what came out.
Repeat the cycle as many times as the brush needs. Between rounds, comb the paint out with your fingers, moving from the ferrule toward the tip. Removing dried oil paint takes several rounds, and each one loosens a little more.
Paint that has cured inside the ferrule rarely comes out completely, and a rescued brush may never come to a point again. Stop when the bristles feel soft and flexible.
A brush that will not fully recover still has work to do. Keep it for scrubbing in underpaintings, for texture such as grass and foliage, or for spatter. The good brushes stay reserved for detail and the final layers of a painting.
Drying and Storing Brushes So They Keep Their Shape
Dry brushes lying flat, or hanging tip-down. Water that runs back into the ferrule swells the wooden handle and loosens the ferrule, so a wet brush never stands upright with its bristles in the air. Wipe the handles dry as well, since water on the wood finds its way into the same joint.
To help a brush dry in shape, wrap the damp head in a strip of paper towel or toilet paper, snug but gentle. The paper holds the hairs in place while they dry, and the brush comes off the shelf ready to use.
Once the brushes are fully dry, store them upright, bristles up, in a jar or a cup. Choose a ventilated room out of direct sunlight, and keep them away from moths, which damage natural hair. A tidy jar of straight, dry brushes also makes a bent tip easy to spot early.
Caring for Sable, Hog Bristle and Synthetic Brushes
Sable and other soft natural hair
Every wash strips some of the natural oils from soft hair. Condition sable brushes a few times a year, reshape the head after each wash, and dry very soft brushes tip-down. Maintaining sable brushes is a gentle routine repeated over years. Because they are delicate, keep them for the final, most visible layers of a painting, and use sturdier brushes for scrubbing and mixing.
Hog bristle
Hog bristle stains easily and keeps a slight tint even when clean. The tint has no effect on how the brush paints. Stiff and springy, hog bristle handles the heavier paint of early layers well.
Synthetic
Synthetic brushes cost less, and they last far longer with the same routine of wipe, rinse, soap and reshape. Cleaning art brushes in this order suits every hair type, and the differences lie in how gently each one is handled.
Keep oil brushes separate from brushes used for acrylic.
Studio Safety: Ventilation, Oily Rags and Disposal
Work with solvents in a ventilated space, and wear gloves to keep them off your skin. Fresh air keeps fumes from building up, and a lidded jar keeps them contained between rinses.
Oily rags need the most care in a studio. Rags and paper towels soaked in linseed oil or turpentine heat up as the oil cures, and a pile of them can ignite on its own. In one documented case, wadded paper towels soaked with linseed oil ignited on a vehicle floor, and others found in a trash bag were extremely warm to the touch. On April 9, 2026, two separate smoldering-rag fires broke out in Cambridge, Massachusetts. Safe handling means spreading rags flat to dry in a ventilated place, or keeping them in a covered metal can, soaked in water.
Dirty solvent and oil need a plan too. Let the pigment settle in a lidded jar, pour off the clear top layer to reuse, and collect the sludge. Leftover paints and oils count as household hazardous waste, and pouring them down the drain can contaminate septic tanks and wastewater systems. Oakland County's NoHaz collection events accept paint thinners, oil-based paint and artist paints in sealed containers. Royal Oak is not on the 2026 member list, so residents can attend for $135 per vehicle per event or check their own city's program. Dates for 2027 are expected in February 2027.
Read the label on every art material. Products sold in the U.S. carry a statement of conformance such as "Conforms to ASTM D-4236", and the CL and AP seals tell you whether a product needs cautionary use.
Build Good Brush Habits in the Studio
Clean brushes are part of learning to paint well, and good habits come fastest with someone showing you. Atelier School of Art in Royal Oak teaches oil painting classes for all levels, beginners included, in classes of around 10 students. Painters can bring their own brushes or join the Materials Plan for $80 a month and use the studio's paint, brushes, palette and mediums. Every enrolled student receives a recommended materials list. You can register for classes online, or set up a studio tour to see the space first.