

Every art class has a moment when the paper is blank, the pencil is sharp and nothing comes to mind. This list of things to draw in art class is for that moment. It suits a student sitting in class right now, a parent helping with an assignment, or an adult getting ready for a first lesson. Whether you are picking up a pencil for the first time or have already filled a few sketchbooks, you will find a place to begin.
The 25 ideas run from five-minute warm-ups to subjects that ask for more looking. Every idea comes with a short way to start, so you can be drawing within a minute of choosing one. These are things to draw for art class that build real skills, such as seeing shapes, judging light and creating depth. A pencil and a sheet of paper are all you need.
Quick Warm-Up Drawings for the Start of Class
These five easy things to draw for art class take about five to ten minutes each. They loosen the hand and train the eye, so the longer drawing that follows goes more smoothly.
1. Basic Forms
Draw a sphere, a cube, a cylinder and a cone. Pick one light direction, such as a lamp on your left, and shade each form so the dark side always faces away from the light. These four shapes sit underneath almost everything else you will ever draw, which makes them a fine place to start every session.
2. The Circle Challenge
Fill a page with circles of different sizes. Then turn each circle into something new, like a planet, a button, a clock, an orange or a face. Quick changes like these teach your hand to make round shapes with confidence and your mind to see ordinary objects as simple forms.
3. A Blind Contour of Your Hand
Rest your pencil on the paper and look only at your hand. Follow each edge, crease and fingernail with your eyes while your pencil moves at the same slow pace, and keep your eyes off the page until you finish. The result looks wobbly, and that is part of the charm, because this exercise trains your eye to take in the real edge of a shape.
4. A One-Line Drawing
Choose one object, such as a shoe, a plant or a pair of scissors, and draw it without lifting your pencil. Let the line loop back over itself whenever it needs to. A single line keeps your eyes on the object and frees you from the urge to erase.
5. A Pattern Page
Pick three marks, such as a line, a dot and a simple shape, and repeat them in rows, clusters and bands until the page is full. Change the size and spacing as you go, so some areas look busy and others look open. A pattern page is a calm way to settle into class, and it builds control of the pencil.
Everyday Objects to Draw From Life
Four easy things to draw in art class sit within arm's reach of most students. A mug, an apple, a pair of shoes and a sheet of paper can be found in any classroom or kitchen, and each one teaches a different skill. Drawing a real object puts depth, edges and light right in front of you, which is the heart of our post on drawing from life versus photos.
6. A Coffee Mug
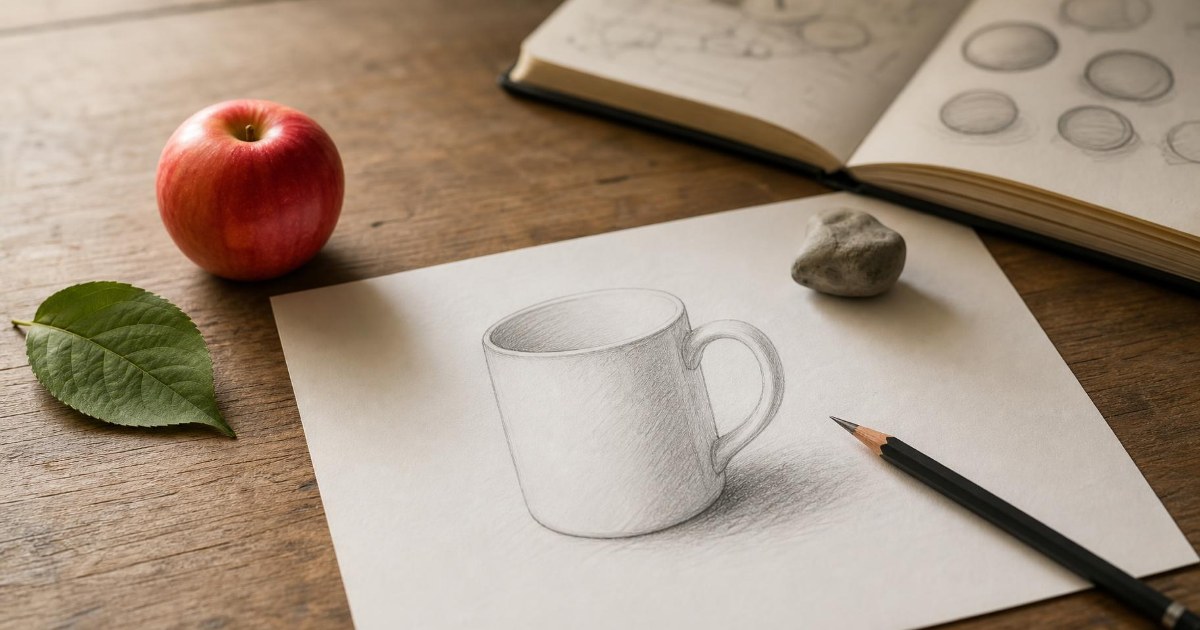
Start with the ellipse of the rim. Sketch a light oval, then adjust it until the opening looks round and tilted just the way you see it. Add the handle last, matching its curve to the curve of the cup. Once you can draw this ellipse, you can draw any round container.
7. An Apple or a Bowl of Fruit
Set the fruit on a plain surface with one lamp or one window beside it. Draw the round outline first, then look for three tones: the lit side, the shaded side and the cast shadow on the table. A single light source keeps the shadows simple, and a simple shadow is easy to read and easy to draw.
8. An Old Pair of Shoes
Block in the overall shape of a shoe as a simple wedge before anything else. Then add the laces, the creases where the leather bends and any scuffs along the toe. Old shoes carry a lot of wear, and the creases show you how folded material catches light.
9. A Crumpled Sheet of Paper
Crumple a sheet, open it partway and set it under a lamp. Squint until the paper becomes many small flat planes, some bright and some dark. Draw those planes as shapes of light and shadow and skip the outlines. This is one of the best ways to practice values in a single sitting.
Nature Drawing Ideas
Nature offers outlines that are simple and surfaces that are full of texture. These four subjects can be gathered on a short walk or found on a windowsill.
10. A Single Leaf and Its Veins
Lay a leaf in front of you and draw its outline first, including the stem. Add the center vein, then let the smaller veins branch off at the angles you see. Take a good look at the edge, since the edges of most leaves have small curves and points that make each one different.
11. A Flower in a Vase or a Potted Plant
Begin with the vase or pot, then block in the whole flower as a loose circle or oval. Add the petals as big shapes before you draw any single petal in detail. Watch the way the stem leans, because that lean gives the plant its character.
12. A Tree
Look at the whole tree and draw the big shape of the canopy first, as one soft mass. Add the trunk and the main branches, then break the canopy into clusters of leaves. Single leaves can wait until the very end, and often they are not needed at all.
13. A Pinecone or Seashell, Drawn Close Up
Hold it near and fill the page with it. For a shell, start with the spiral and the ridges that wrap around it. For a pinecone, begin with the oval and add each scale in rows, moving from the base to the tip. Both subjects reward patient looking with rich texture.
Animals and Imaginary Creatures
Animals look hard until you break them into simple shapes. Build each one from circles and ovals first and add details second. The last idea in this group mixes what you see with what you imagine.
14. A Pet
Draw your pet from life if it will hold still, or from a photo you took yourself. Begin with one oval for the body and one circle for the head, connect them, then add the legs and ears. Fur, whiskers and the shine in the eyes come last.
15. A Bird
Start with an oval body and a smaller circle for the head. Add a triangle for the beak, a long wedge for the tail and a pair of thin lines for the legs. Place the eye once the head shape feels right, since the eye sits more easily in a shape that is already working.
16. An Insect Up Close
Pick a bee, a beetle or a butterfly and look at it as three sections: the head, the middle and the rear. Add the legs, the antennae and the wings once those sections are in place. A butterfly is a good test of symmetry, because the two wings mirror each other and any mismatch is easy to spot.
17. A New Creature Made From Two Real Animals
Choose two animals, such as an owl and a fox, and combine them into one. Sketch the basic shapes of both animals lightly, then decide which parts to keep from each. Real details like feathers, fur or claws help an imagined creature look believable.
People, Faces and Hands
These four subjects are for students ready for more of a challenge. Each one is scaled down to something you can finish in one class, using only yourself, a classmate and a mirror.
18. Your Non-Drawing Hand in a Simple Pose
Rest your hand on the table in a relaxed pose. Start with the palm as a simple block, then add the fingers as long tubes, each made of three short sections. Compare the length of each finger to the others as you go, since the proportions matter more than the details.
19. A Self-Portrait in a Mirror
Set a mirror at eye level and begin with the overall shape of your head. Draw a light line across the middle for the eyes and a line down the center for the nose and mouth, then place each feature along those lines. Keep the first marks soft so you can adjust them as you compare the page to your reflection.
20. A Single Eye, Drawn Large
Fill most of the page with one eye. Begin with the almond outline, then place the circle of the iris so the upper lid covers part of it. Leave a small bright spot for the highlight and shade the area around it. Working large makes every shape easy to see.
21. A Classmate in a One-Minute Pose
Ask a classmate to hold a pose for one minute. Capture the flow of the pose with a few quick lines: the tilt of the shoulders, the curve of the spine, the angle of the legs. Aim for the movement and leave the details for another day. Short poses build speed and confidence.
Places and Simple Perspective
These four subjects introduce space and depth. They show how flat paper can feel like a real room, street or view.
22. The Corner of the Classroom
Look at the spot where two walls meet the floor. Draw the vertical line where the walls join, then the two lines along the floor that angle away from it. Notice how those lines tilt as they travel into the room, and match the tilt you see.
23. A Hallway or Road in One-Point Perspective
Mark a dot near the middle of the page for the vanishing point. Draw the edges of the floor, walls and ceiling so each line heads toward that dot. Add doors, lights or road markings as shapes that grow smaller as they near the same point.
24. A House or Building Seen From the Street
Start with the largest box shape of the building. Add the roof as a simple shape on top, then place the door and windows by comparing their sizes to each other. Look at the angled lines of the roof and sidewalk and notice which way they point.
25. The View Out a Window
Use the window frame as the edge of your picture. Draw the frame first, then the big shapes beyond it, such as a building, a tree or the skyline. Objects that sit farther away look smaller and lighter, and that change in size and tone creates the feeling of depth.
How to Pick an Idea and Keep Improving
Start with the subject that interests you. A student who loves animals will draw a bird with far more energy than a student who sees it as a chore. Once you feel warmed up, move to an idea that challenges you, since the harder subjects teach the most.
Begin each drawing with light, simple shapes and add detail later. When the big shapes are right, small details land in the right place without much effort.
Draw real objects in front of you whenever you can. A real mug or leaf shows you edges, depth and light that a camera flattens, and our post on drawing from life versus photos explains why that matters.
Look at the shapes of the empty space around a subject as well as the subject itself. The gap between a mug handle and the cup is a shape you can measure and compare. Our post on negative space drawing shows how to use those shapes to check your accuracy.
Return to favorite subjects. Drawing the same mug on three different days shows you how much your eye has grown, and each pass brings out something new to see.
Drawing is good for you, too. In a Drexel University study, 75% of adults had lower cortisol levels after 45 minutes of making art, and past art experience made no difference to the drop. Every drawing on this list is a good way to give yourself that time.
Where to Go From Here
When you want a teacher beside you, Atelier School of Art in Royal Oak teaches drawing and oil painting classes for all ages, from Youth Studio through adult. The Atelier Drawing class is open to all experience levels and is based on college-level beginning drawing concepts. It covers materials, perspective, sight measuring, composition, block-ins and shading, and it asks for drawing outside class, which ideas like the ones above support.
Youth Studio and Teen Studio include all materials, and classes are kept to about 10 students, so each student receives plenty of one-on-one attention. You can register for classes in the class catalog, or tour the studio to see where the drawing happens and meet the team.