

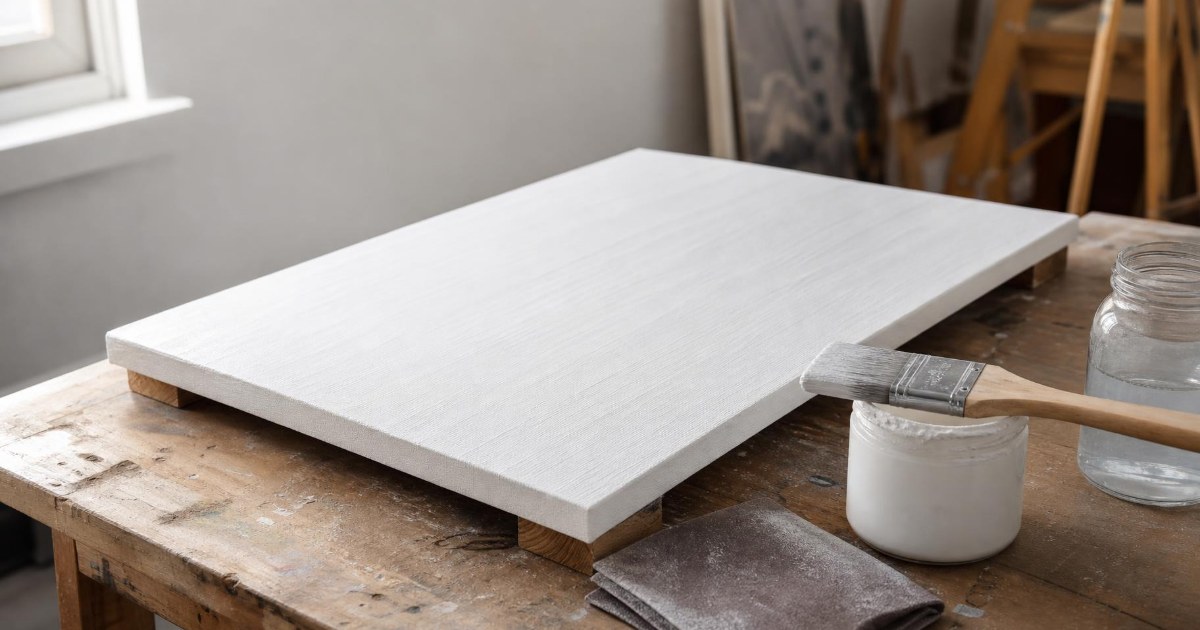
Learning how to gesso a canvas is one of the first skills that helps a painting last. Gesso is a white coating that gives paint a surface to grip and shields the fabric underneath. Anyone who paints on raw canvas needs it, and many painters add a coat or two to store-bought canvas as well, because a factory surface can feel slick. The work takes a brush, a few thin coats and some patience while each layer dries. That small effort protects hours of painting time. This guide shows you how to prime a canvas with gesso, how the steps change for oil paint, and how to tone the surface with colour. You will finish with a canvas that is ready for acrylic or oil.
What Is Gesso?
Gesso is the Italian word for gypsum, the white mineral that gave the material its name. Traditional gesso was gypsum bound in size, an adhesive made from animal skin. Craftsmen applied a coarse lower layer and a finer upper layer, then scraped and sanded the surface smooth. North of the Alps, chalk or another form of calcium carbonate usually took the place of gypsum. This hard, bright ground suited rigid wooden panels, and painters relied on it for centuries.
Most painters today buy acrylic gesso. Acrylic grounds that conservators have analysed contain between 40 and 60 percent acrylic emulsion, 10 to 20 percent titanium white, and 10 to 30 percent fillers such as calcite, silica and kaolin. The acrylic binder stays flexible, which suits a fabric that moves. Liquitex introduced the first acrylic paints in 1955, and early manufacturers borrowed the old word gesso for their new grounds. The name has stayed with the product ever since.
A few terms get mixed up along the way. Gesso, primer and ground all describe the layer that prepares a surface for paint. Museums and conservators favour the word ground. A canvas label that says acrylic gesso and one that says acrylic primer name the same layer, so either product does the job in this guide. Artist grade versions carry more binder and pigment than student grade, a difference that matters when you choose your supplies below.
Why You Should Prime a Canvas Before Painting
Preparing surfaces for painting comes down to four jobs, and gesso handles all of them. It gives the paint tooth, a fine texture that paint can grip. It controls absorbency, so paint sits on the surface where you can work it. It builds a barrier between oil and the fabric fibres. It also leaves an even white surface that shows true colour from the first stroke and holds up as the years pass.
Raw canvas drinks paint. Colours dry dull because the pigment sinks into the fibres, and brush strokes drag and skip across the open weave. Oil brings a deeper problem. Oil paint is acidic, and when it reaches bare fibres it can rot the support over time. A primed surface keeps the oil in the paint layer, where it belongs.
Absorbency matters for the paint film too. A highly absorbent surface can draw too much binder out of oil paint, which leaves the film underbound and prone to cracking or flaking. A good ground holds that binder in the paint. Even a thin, well-made coat of gesso gives every painting a steadier start.
Do You Need to Gesso a Pre-Primed Canvas?
Store-bought canvas comes in two kinds. Raw canvas has the dull cream colour of bare cotton or linen, a soft feel and an open weave. Pre-primed canvas is bright white and slightly stiff, because a layer of gesso already fills much of the weave. The label usually says primed or ready to paint.
Many painters still add one or two coats to a pre-primed canvas. A factory surface can feel slick and slightly waxy, so paint slides before it grips. The weave often shows through the factory coat, which matters for fine detail. A fresh layer gives the brush something to hold, and a new coat of gesso restores tooth on a sealed surface. The extra coats also leave a firmer, more even feel under the brush.
A good pre-primed canvas can be painted on as it comes. If the surface grips your brush, the weave suits your subject and the canvas feels firm, you can begin right away. Quality varies from brand to brand. Lower-quality pre-primed supports can contain additives that lead to cracking and delamination under oil, so oil painters often add their own coats to be sure of the ground.
How to Gesso a Canvas, Step by Step
Gather your materials before you open the jar. You need gesso, and artist grade is the better choice, because student grade has less acrylic and more solids and water, which leaves it susceptible to cracking when flexed, rolled or applied thickly. You also need a wide, flat brush, a roller or plastic scraper, a container for thinning, water, fine sandpaper, disposable gloves and a raised spot where the canvas can dry, such as a few blocks that lift it off the table. Lay down a drop cloth or old newspaper to protect your work surface. Six short steps take a canvas from bare fabric to a ready surface.
Prepare the canvas
Start with a stretched canvas that is clean and free of dust. Wipe the face with a dry cloth and check that the fabric sits tight on its stretcher bars, since a loose canvas ripples as the gesso dries. Raw canvas that will carry oil paint needs a coat of size before any gesso, a step covered in the oil painting section below. Canvas for acrylic paint can go straight to gesso.
Apply a thin first coat
Stir the gesso well, because the solids settle at the bottom of the jar. Pour some into your container and thin it slightly with water so the first coat works into the weave. Brush it on in parallel strokes from one edge to the other, keeping the pressure light and the strokes even. Keep a wet edge as you move across the canvas so the coat levels itself. Coat the sides of the canvas too, which keeps the edges clean and consistent when the painting is finished.
Let it dry
Wait until the coat feels dry to the touch before you add the next one. Drying time shifts with humidity, temperature and how thickly the gesso went on. Press a fingertip to an edge or the back of the canvas. A surface that feels cool or tacky needs more time, and a rushed second coat can drag and lift the layer beneath it.
Sand between coats
Once a coat is dry, a light pass with fine-grit sandpaper smooths ridges and brush marks. Sanding gesso layers lightly produces a polished surface, and how much you sand depends on how you paint. Portraits and fine detail suit a smooth ground, so those painters often sand after every coat. Thick, textured brushwork suits a toothier ground, so those painters sand less or leave the brush marks in place.
Wear a dust mask and keep the room ventilated while you sand, because gesso dust carries chalk, and exposure limits exist for calcium carbonate dust. Hard sandable gesso belongs on rigid panels, since it can crack when flexed. A flexible stretched canvas does best with standard acrylic gesso.
Add more coats at right angles
Turn the canvas 90 degrees before each new coat. Strokes that cross the previous ones fill the weave evenly and keep ridges from running in a single direction. Two to three coats suit most acrylic painting, and each one follows the same rhythm of brushing, drying and a light sanding if you want a smoother finish. Oil painting calls for more coats, which the next section covers.
Clean up
Wash your brush or roller in running water as soon as you finish. Dried gesso is acrylic plastic, and it ruins bristles for good. Rinse the container too, and wipe any drips from the sides of the canvas and your work surface while they are still wet.
Priming Canvas for Oil Paint
Priming canvas for oil paint follows the same steps with three changes: sizing, more coats and a longer wait. Raw canvas needs size first, because size stops acidic oil from reaching the fibres, where it can rot them. Golden Artist Colors recommends one coat of GAC 400 followed by three or more coats of acrylic gesso, a system that stiffens the canvas and blocks the oil. Pre-primed canvas already carries its first layers of gesso, and your extra coats build on them.
The wait before the first oil layer runs longer than most beginners expect. Most of the moisture leaves a brushed gesso film in the first 72 hours, and the film keeps curing for a month or more. Golden gives three days as the minimum before oil, two weeks as its usual recommendation and a month as ideal. A surface that still feels cool or clammy is not ready.
Acrylic gesso suits oil painting well. Conservation research and more than 40 years of use show that high-quality acrylic gesso gives excellent adhesion for oil paint and serves as a fully archival ground. Quality matters here, because four layers of a high-quality acrylic ground come very close in stiffness to a layer of lead white oil paint. Traditional grounds bound with rabbit skin glue stay water-soluble, so humidity swings make the glue swell and contract, which can lead to adhesion failure. Acrylic gesso avoids that problem.
Acrylic gesso goes under oil paint. An old oil painting is a surface for more oil, because oil forms tight, water-resistant films that give acrylic poor adhesion. Keep that order in mind whenever you reuse a canvas.
How to Tone the Canvas After Gessoing
A toned canvas carries a coloured ground in place of bright white. Painters usually choose a mid-tone such as a warm grey, a brown or an ochre. The colour and tone of a ground affect the colour and tonal values of the paint layers over it. Poussin used reddish grounds, Rembrandt favoured brownish ones, and some 19th century artists, especially the Impressionists, preferred white.
Painters work on a toned ground for good reasons. Bright white glares, and it makes judging values harder as you paint. A toned ground removes that glare and gives you a middle value, so you can work lights above it and darks below it. It also pulls the colours of a painting together, because a little of the ground shows through between strokes.
Coloured grounds have a long history in oil painting. They gained popularity across Europe during the 16th century and were in use everywhere in Netherlandish painting by the second quarter of the 17th century. Researchers link them to tonal harmony and to more open, efficient brushwork.
You can tone the canvas in two common ways. The first is a thin wash of paint over dry gesso. Thinned acrylic works well, brushed on with a wide brush in even strokes. The second is tinting the last coat of gesso with a little acrylic paint, which gives you a toned ground in a single step. Let the toned layer dry fully before you begin painting, and keep the colour muted so it stays a quiet partner to your palette.
Ready to Paint
Preparing a surface is one of the first habits a painter builds, and it pays off with every layer that follows. Atelier Painting is an oil painting class open to all levels, including beginners. Classes are small, and instructors guide students through each step of a painting. Students can bring their own supplies from the recommended materials list or join the $80/month Materials Plan, which supplies a canvas along with paint, brushes, palette and mediums. You can see the schedule and tuition on the painting classes page. When you are ready to start, you can register for classes and choose a time, or reach out through Contact Us to arrange a tour of the studio.