
You set up a pose, start with the head, and work your way down the figure one careful part at a time. The eyes are right. The hand is right. Then you step back and the whole figure looks stiff, like a set of well-drawn parts that never joined up. The head runs a little large, the hips do not line up with the shoulders, and the pose has no direction.
Almost every realist runs into this early. The answer is gesture drawing, a fast drawing of the pose's energy, weight and flow, made in seconds before any detail goes down. Gesture gives you the whole figure first, so every part you add later has a place to belong. This post covers what gesture drawing is, why realistic figures start with it, and how to practice it, from your first line of action to a warmup routine you can repeat every day.
What Is Gesture Drawing?
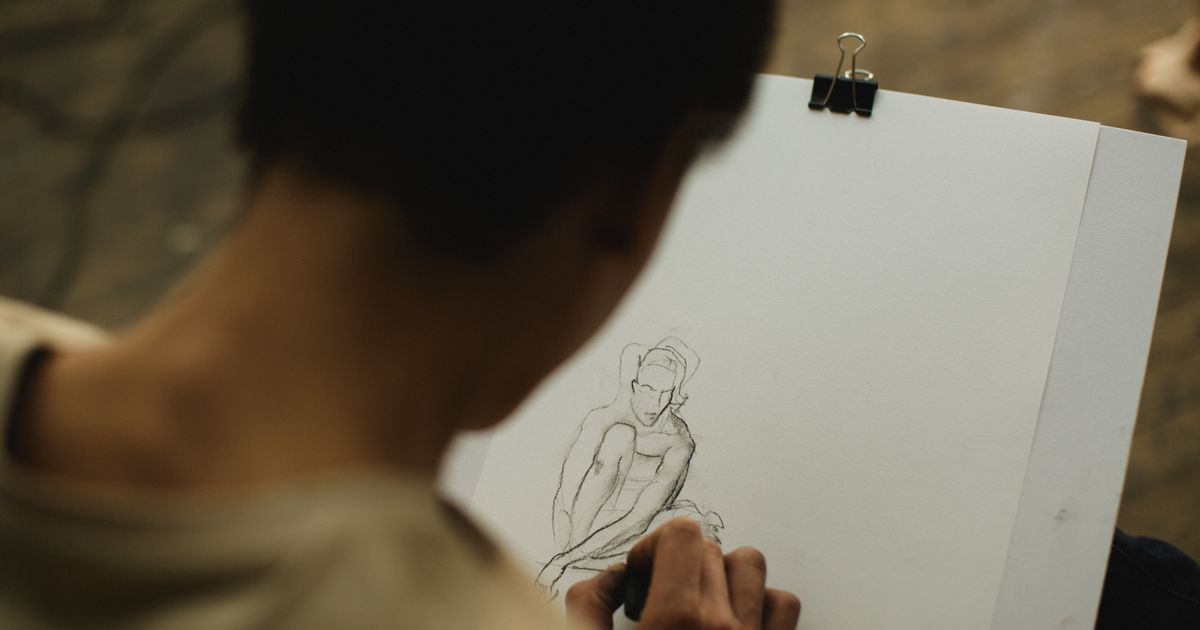
Gesture drawing is a fast drawing that records the action and pose of a figure and leaves out the details. Traditional sessions run from about 30 seconds to two minutes, which leaves time for the main movement and nothing else. Features, clothing and fingers have to wait.
A gesture answers one question: what is the model doing? Maybe she is reaching, leaning, bracing or turning away. Every mark you make describes that action, and any mark that does not help describe it can stay off the page. The word fits well. A friend's shrug or wave tells you something before you notice their face, and a gesture drawing goes for the same quick read.
Around the two-minute mark, a drawing stops being a gesture. You start measuring angles, comparing sizes and rendering form. Those skills matter, and they have their own place later in the process. Gesture is the work that comes first.
Most gestures start with the line of action, a single flowing stroke that runs through the figure along the main direction of the pose. It often travels from the head down the spine and into the leg that carries the weight. Once that line is down, the rest of the figure hangs from it.
Since a few seconds of looking and a few loose marks are all it asks, gesture drawing is easy to start, even if you have never drawn a figure.
Why Realism Starts With Gesture, Not Detail
Detail-first drawing asks you to commit before you know the whole. The first eye you draw sets the scale for everything after it. If that scale is slightly off, the head grows large, the hands shrink, and the hips drift away from the ribcage. Every part is accurate and the figure is wrong.
Research on drawing points the same way. In one eye-tracking study, every beginner made marked errors of overall scaling, proportion and shape while the experts copied accurately. Those are errors of the whole figure. A separate study of 65 artists and non-artists found that artists could be identified by how much they shifted their attention between the whole subject and its parts while they drew. Gesture drawing builds that habit, because a gesture can only be made by looking at the entire figure at once.
Gesture also works as a partner to the measured block-in. The block-in supplies proportion by placing the big shapes at the right sizes and angles. The gesture supplies life. Measurements record where each part sits, and the gesture records what the pose is doing, so a block-in built over a gesture keeps the motion of the pose.
Atelier School of Art teaches this classical sequence in its Royal Oak studio. The Atelier Drawing class covers sight measuring, block-ins and shading, and the Art From Life class progresses from gesture drawing to sight measuring and human proportions. Students learn to see the movement of a pose first and then measure it with care.
What Gesture Trains Your Eye to See: Energy, Weight and Flow
People read movement from very little information. In a well-known experiment, twelve points of light attached to the joints of an otherwise invisible body were enough for viewers to see a moving person within a fraction of a second. A handful of gesture lines can carry a pose in the same way, and capturing movement in art comes down to three things to look for: energy, weight and flow.
Energy is the direction and thrust of the pose, and it travels along the line of action. A runner's energy drives forward and down through the back leg, while a person leaning on a wall sends a slow, steady energy toward the point of contact. Ask where the pose is heading, and draw that.
Weight tells you which leg carries the body. The standing leg sits under the center of the figure, and the other leg relaxes. Check the shoulders against the hips: the hip over the weight-bearing leg is usually higher, and the shoulder on that side drops. That tilt changes the angle between ribcage and pelvis, which squashes one side of the torso and stretches the other. Draw the squashed side with short, compressed marks and the stretched side with one long line.
Flow is how the eye travels through the figure. C and S curves do the leading. The curve of the back sweeps into the neck, a shoulder line continues down an arm, and a thigh carries on through the calf. Look for the largest curve first, then the smaller curves that answer it. When those curves connect, the figure reads as one motion.
How to Draw a Gesture, Step by Step
Here is a short sequence for gesture drawing for beginners. Use it on the next pose you see, whether that is a live model, a classmate or a figure on a screen.
Find the line of action
Look at the pose for a few seconds before you draw. Find the one sweep that runs through the figure's main direction, often from the head through the spine and into the supporting leg. Draw it in one confident stroke, and let it curve if the body curves.
Place the head, ribcage and pelvis
Mark the head as a simple oval at the top of the line. Then add the ribcage and pelvis as two rough shapes, tilted the way you see them. These three masses hold the pose together, and their positions to each other tell you most of what you need.
Set the shoulder and hip lines
Draw a short line across the shoulders and another across the hips. Notice how they tilt against each other. When the lines run in opposite directions, the figure has a twist and a sense of weight. When they run parallel, the pose feels still.
Swing in the limbs by direction, not shape
Draw each arm and leg as a single line that follows its direction, from the shoulder or hip out to the hand or foot. Let the lines curve a little. Skip fingers, toes and muscle shapes, because a simple line is enough to show where a limb is reaching.
Stop before you start rendering
When the timer ends, put the pencil down. Resist adding shading, features or outlines. A gesture is finished when it shows the action, and the next pose is waiting for a fresh look.
Gesture Drawing Tips for Beginners
The first of these gesture drawing tips is to leave the eraser in your bag. If a line is wrong, draw over it with a better one. The wrong line stays behind as part of the drawing's energy, and you save the time you would have spent erasing.
Keep your first marks light and loose, so you can adjust them as you see more. Choose curves over straight lines, since bodies are made of curves and a curved stroke moves the way a body moves. Draw from the shoulder and let your whole arm swing, because fingers tend to tighten up and slow you down.
Look at the model more than the paper. Research on drawing accuracy found that glancing often between the subject and the drawing improved the result, so let your eyes make many short trips. When you look up, ask what makes this pose interesting, then exaggerate it a little: a deeper lean, a stronger twist, a longer sweep.
Soft materials suit the work. Charcoal and soft graphite pencils move easily, make quick tonal marks, and forgive hesitation. Drawing students at Atelier School of Art bring their own supplies and receive a recommended materials list when they enroll.
Early gestures look odd. Expect lopsided figures with tiny heads and very long arms. Draw a few simple mutants, laugh at them, and move on to the next pose.
Timed Drawing Exercises and Figure Drawing Warmups
A gesture session works best when the poses start very short and grow longer. Begin with a round of 30-second poses, move to one minute, then two, then five. The short poses force you to find the main movement, and the longer ones give you room to add structure without losing it. This makes a natural figure drawing warmup before a long pose, and ten minutes of it makes a good daily habit on its own.
Timed drawing exercises like these train quick decisions. You cannot fuss over a hand while the timer runs, so the big read of the pose wins.
Two quick sketch techniques add variety. The scribble gesture builds the figure from the inside of a shape outward. Use a continuous, looping scribble that follows the volume of the pose, from the center of the torso out to the limbs, and let the figure appear from the tangle. The mass gesture lays the figure in with the side of a piece of charcoal. Broad strokes block in the weight of the head, torso and hips as simple dark shapes. A line of action shows direction, a scribble shows volume, and a mass shows weight, so each one gives you a different view of the same pose.
Where your poses come from shapes what you learn. A live model is the strongest source, since you see weight and depth directly and the figure moves in real space. Our post on drawing from life versus photos goes deeper into why direct observation teaches so much. On days you cannot get to a studio, a timed photo reference tool is the at-home alternative. It changes the pose at set intervals and keeps your practice on schedule.
Practicing Gesture in the Studio
At Atelier School of Art in Royal Oak, gesture sits inside a full sequence of training. The Art From Life class welcomes beginners and experienced artists, and it starts with basic techniques before progressing through gesture drawing, sight measuring and human proportions. Sessions include both short and long-form work, with regular feedback and demonstrations along the way.
The Figure Drawing Master Class works with a live model and covers gesture, balance, proportion, anatomy, and light and shadow. Classes stay around 10 students, so an instructor can look at your gestures and tell you what the pose is asking for.
You can Register for Classes or Tour the Studio to see where your next gesture drawing could happen.